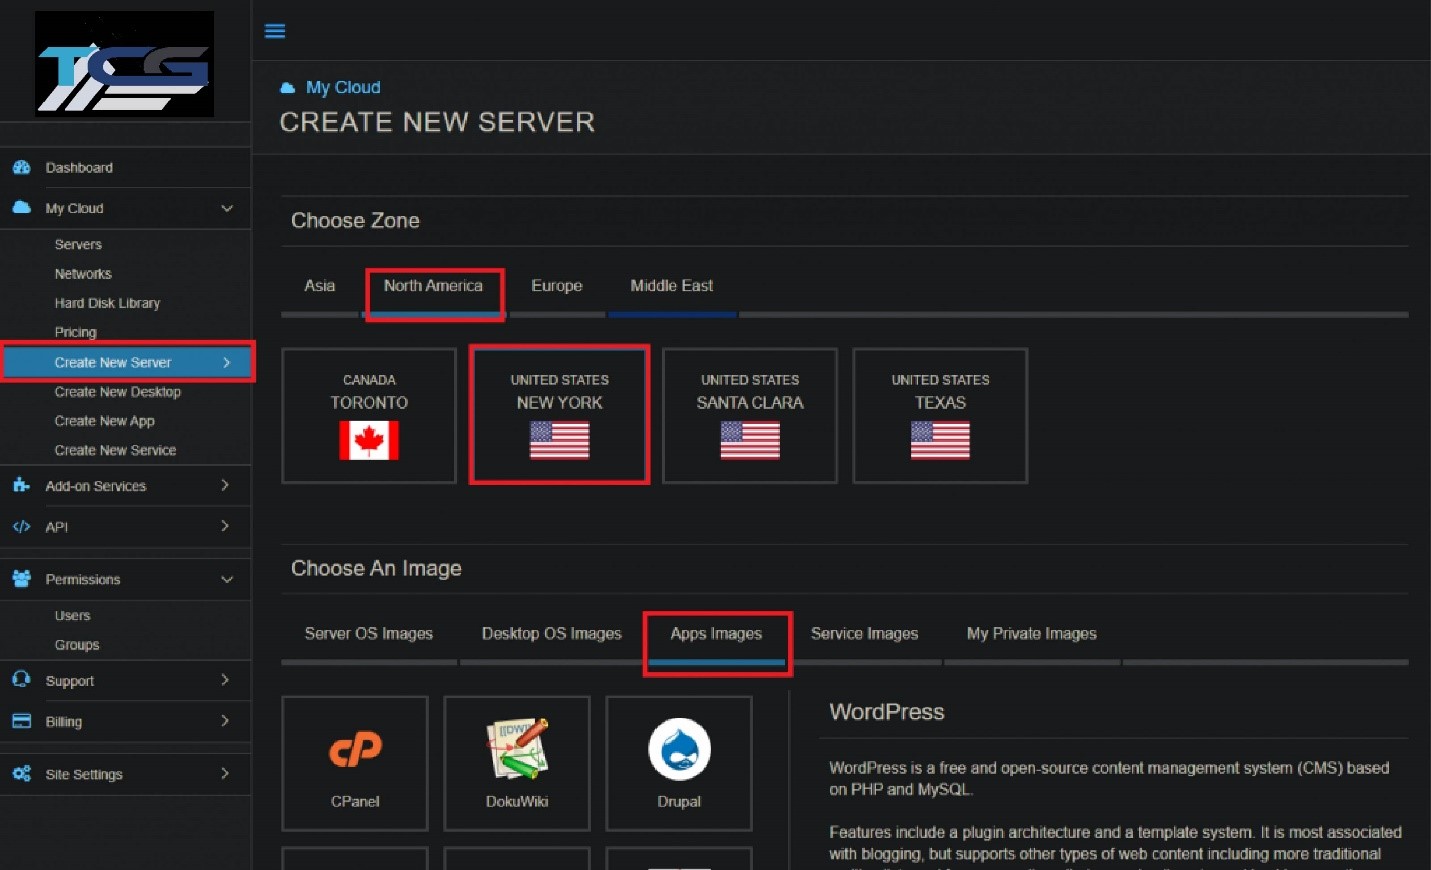
From the administrative panel on the left side of the screen select “My Cloud” > “Create New Server”.
Select an appropriate zone and data center location.
Navigate to the “Apps Images” tab.
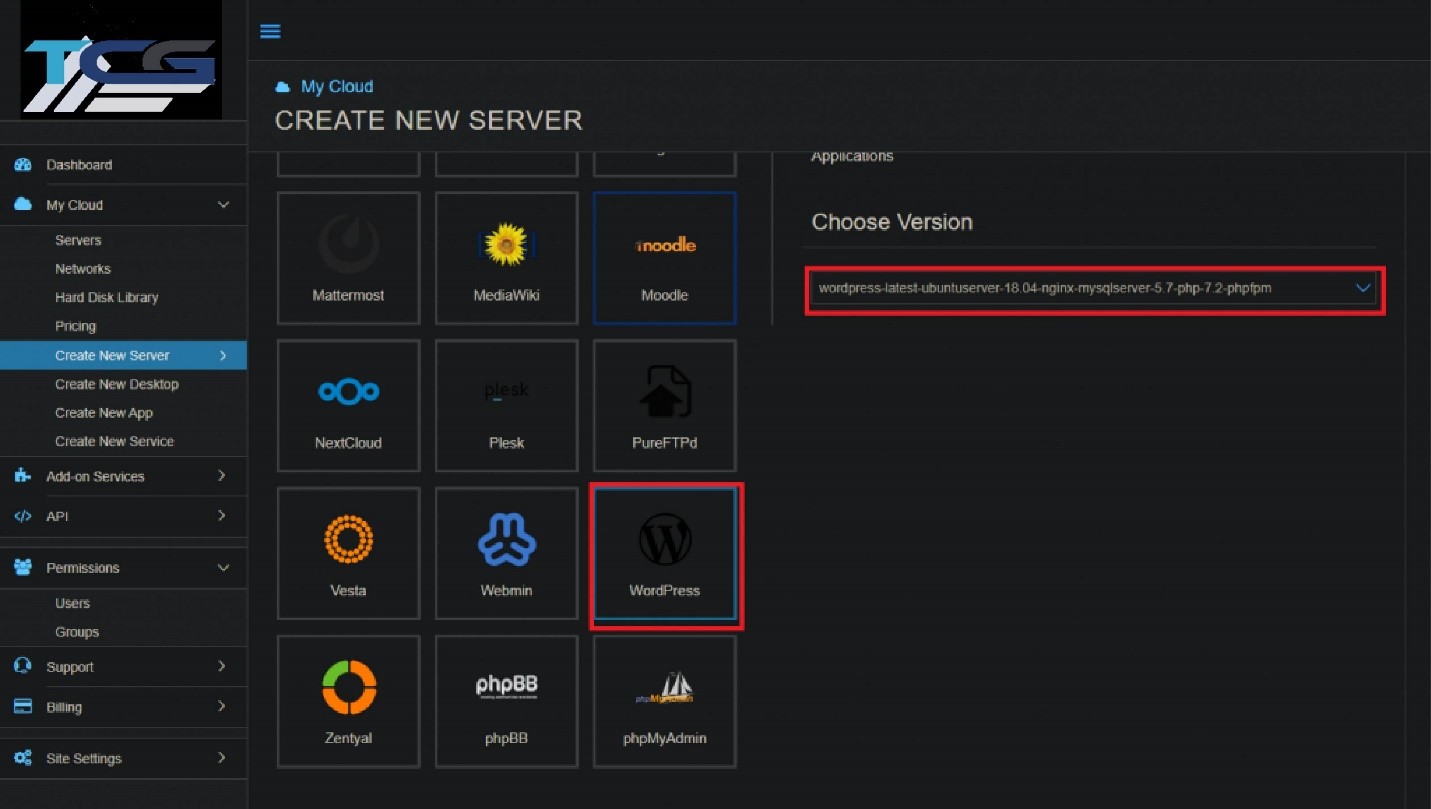
4. Under “Apps Images” scroll down and select WordPress, then choose the latest version.
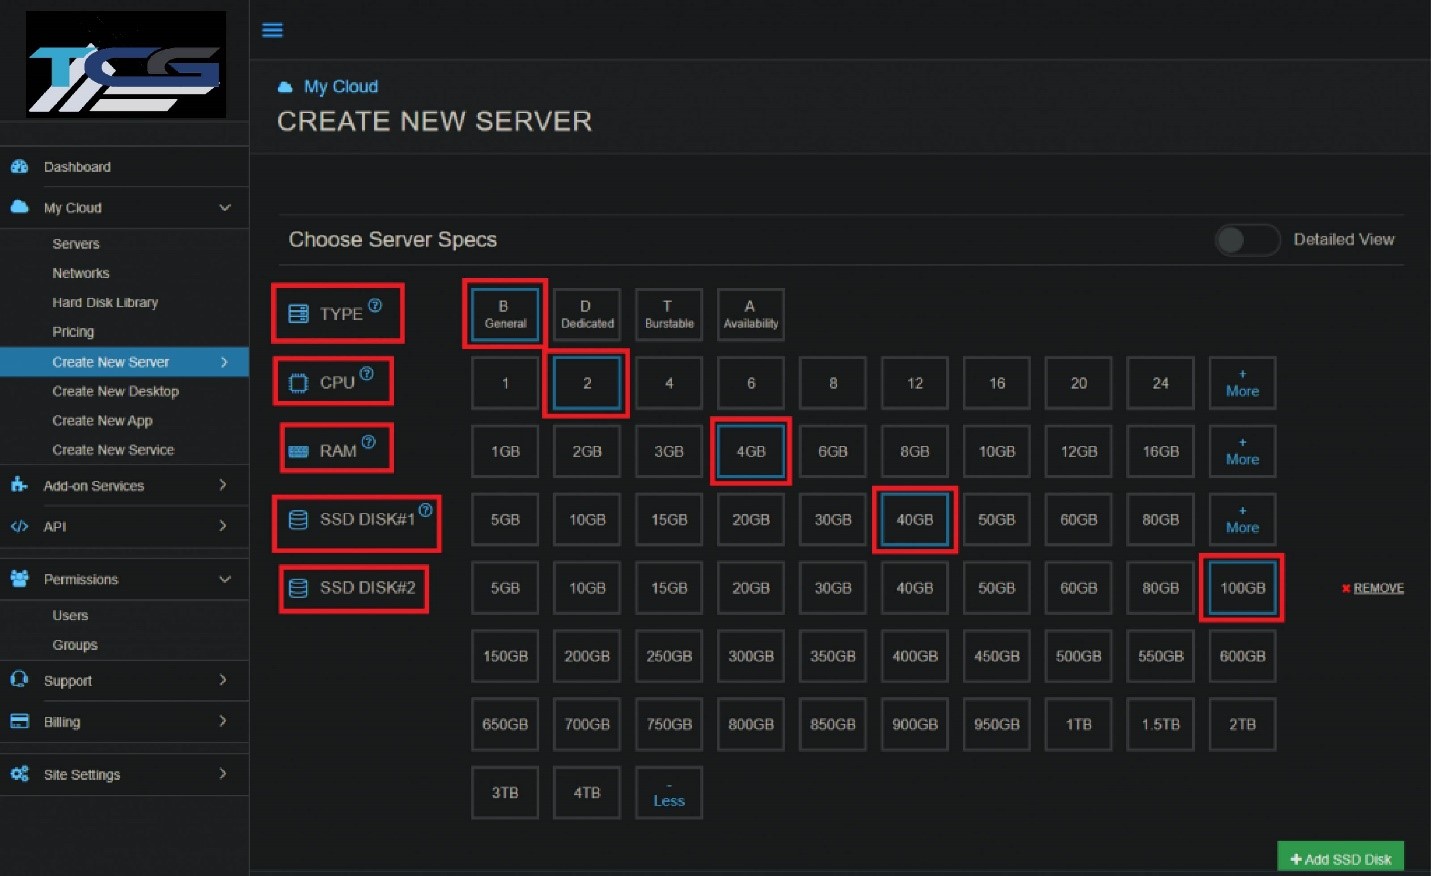
5. Scroll down to “Choose Server Specs” (below the app image options) and select preferences for TYPE, CPU, RAM, and DISKS.
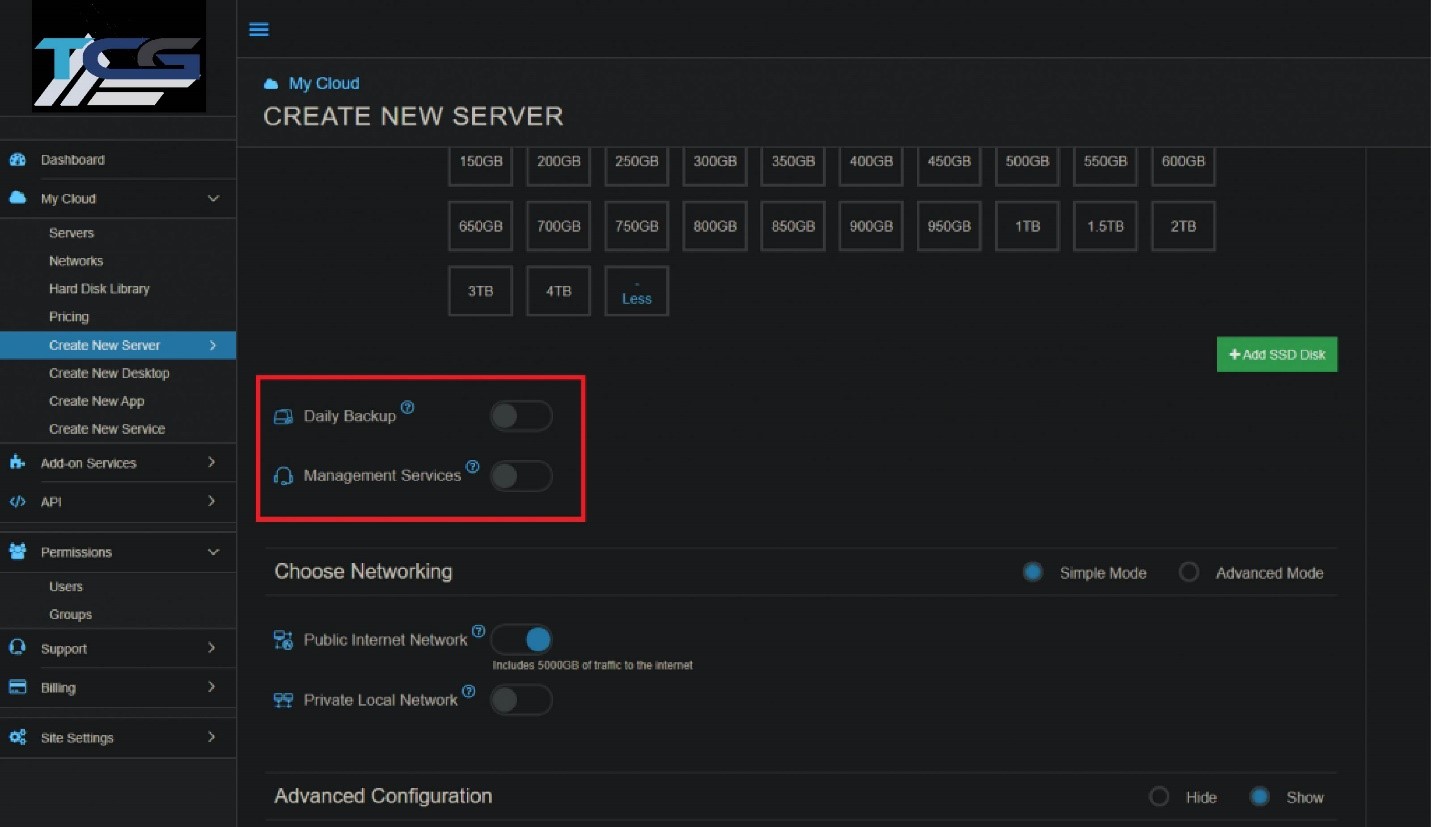
6. Daily Backup and Management Services can be activated directly below the server specifications section.
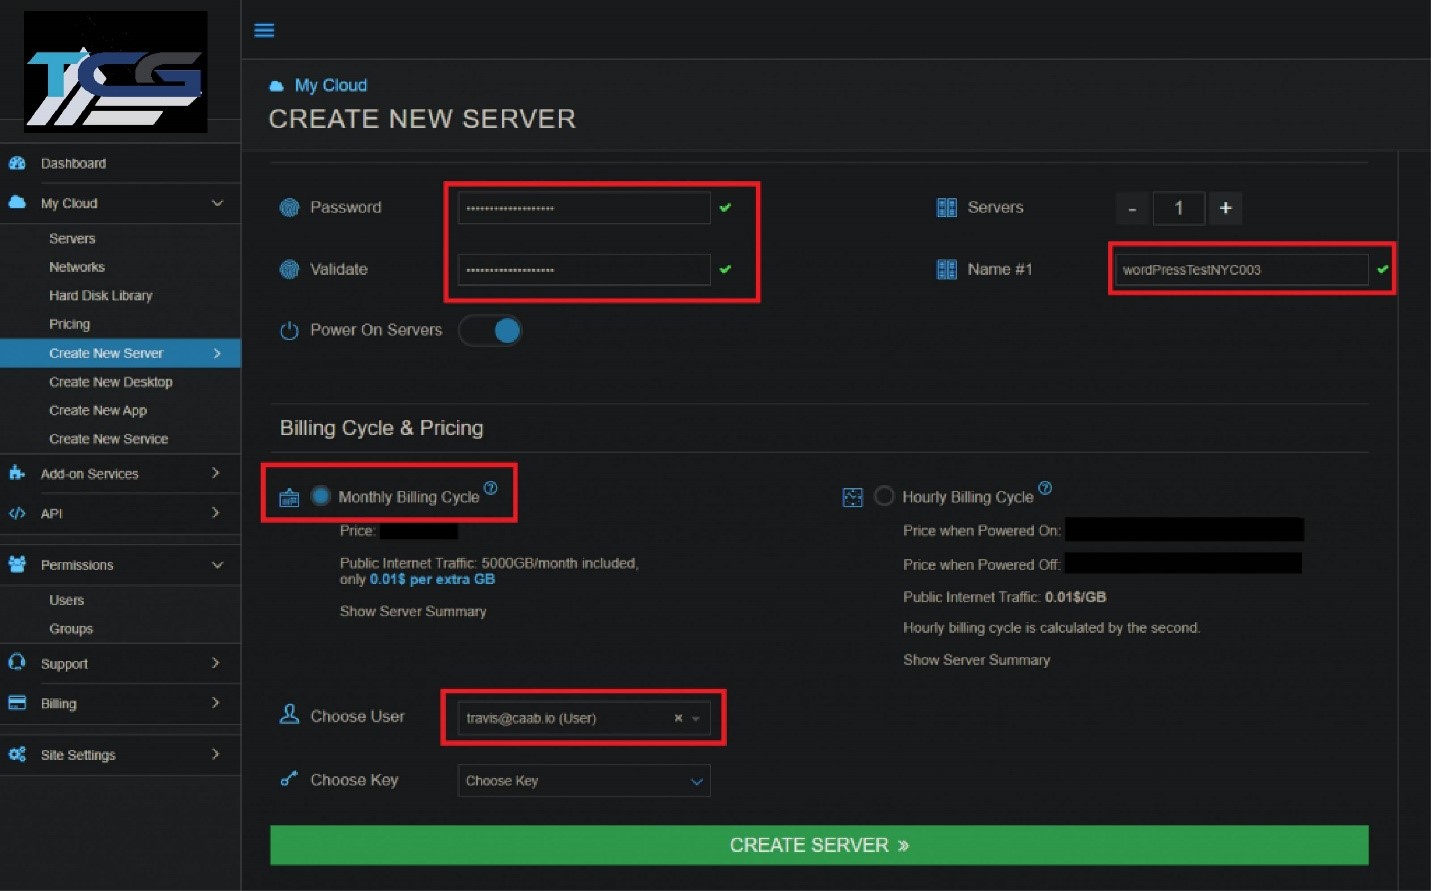
7. Continue scrolling towards “Finalize Settings”. Create a server name and create and validate an appropriate password. Note the password requirements. Enter the user’s email credentials and select CREATE SERVER when finished.
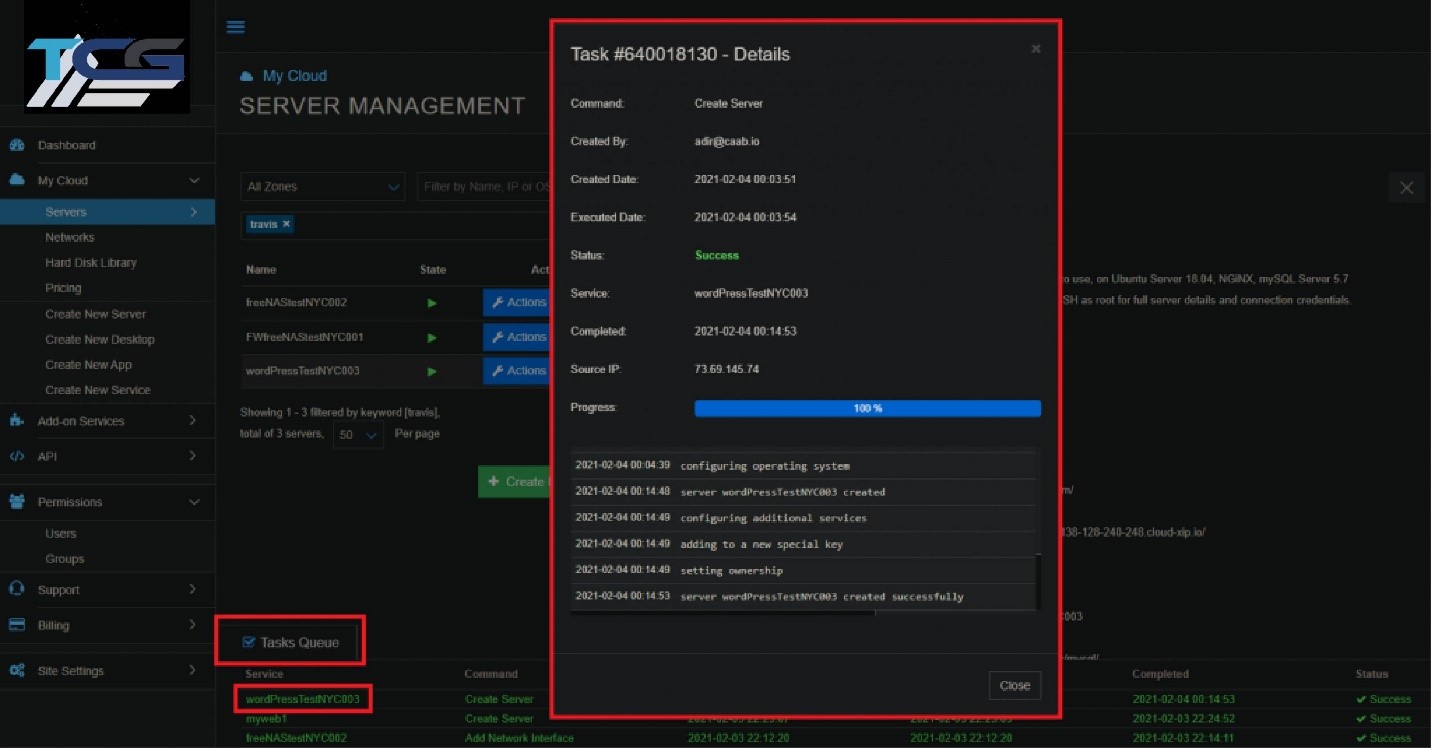
8. Select “Tasks Queue” and your server’s name to view installation progress.
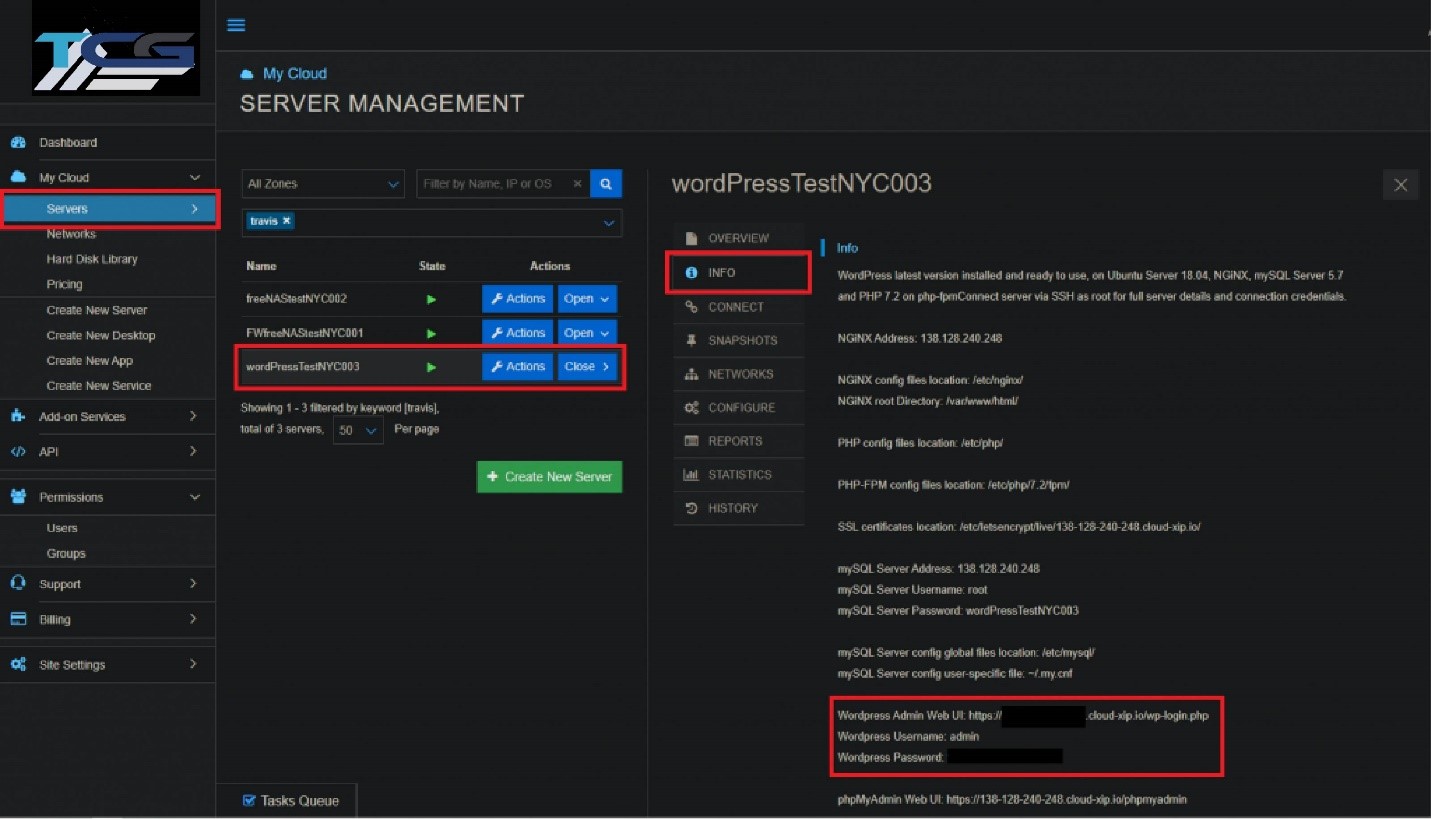
9. Once the server is created, you will find it under the “Servers” tab. Select the server, and then select the “Info” tab for connection credentials. WordPress Admin Web UI credentials are highlighted.
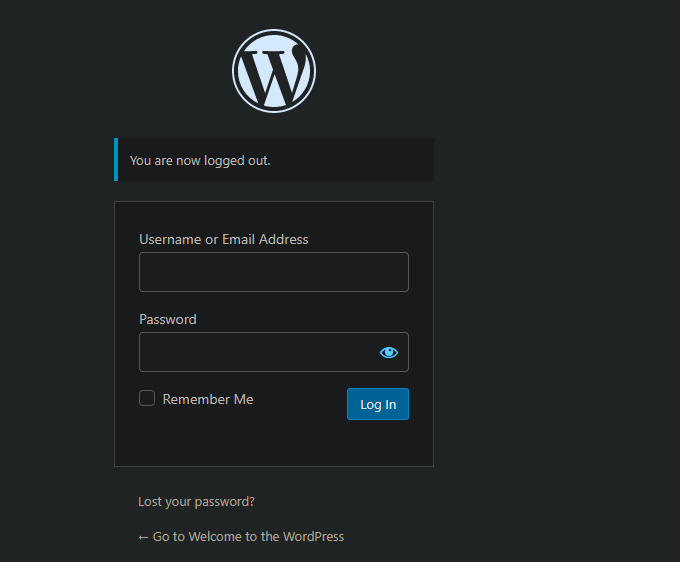
10. Copy and paste the WordPress Admin Web UI link (https://example.cloud-xip.io/wp-login.php) into your favorite browser – you will navigate to the login portal. Here enter the admin credentials and select “Log In”.
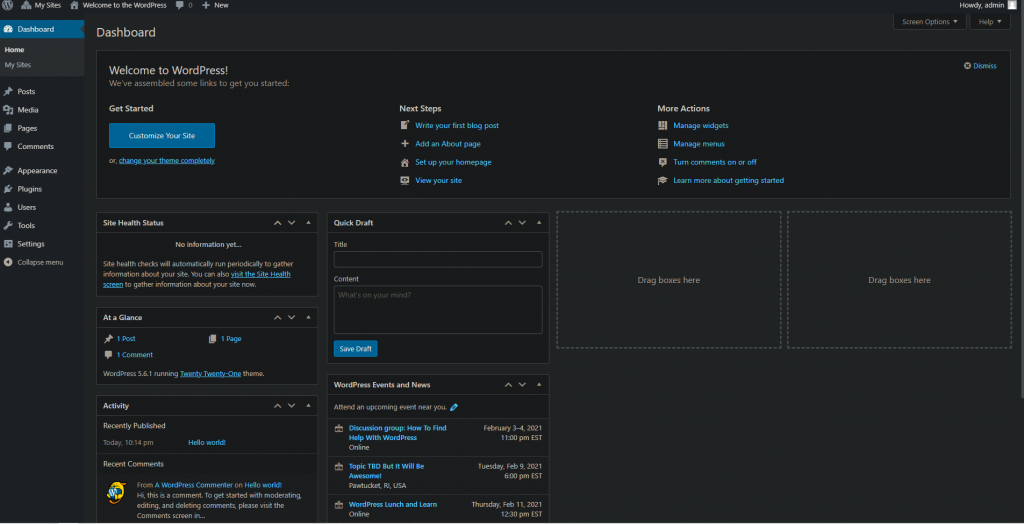
11.You will now have access to the admin dashboard.